

October 7, 2026
Instead of manually rebuilding your book layout after every edit, export a print PDF from Reedsy, check it against your printer’s specifications, and prepare the cover separately. This Reedsy to print book workflow takes your 2026 manuscript from editable chapters to checked files for Publishing Xpress short-run book printing.
A manuscript and a print-ready book are different things. Your manuscript contains the words; your print files also determine page dimensions, chapter openings, image placement, and the space readers need beside the binding.
Publishing Xpress is best for self-publishers and organizations seeking short-run book printing. Reedsy and a printer serve different stages of that process, so you do not need to choose one instead of the other.
For your 2026 edition, use Reedsy to create the interior layout, then evaluate the exported PDF as a production file. A successful export does not establish that the trim size, cover dimensions, or binding clearance match your order.
| Tool or service | Best for | Main advantage | Limitation in this workflow |
|---|---|---|---|
| Reedsy | Authors formatting text-led manuscripts | Organizes book content and exports formatted book files | The exported interior still needs printer-specific checks and a separate cover |
| Publishing Xpress | Authors and organizations printing short runs | Prints books and other documents in black-and-white or color, with multiple binding options | Printing does not replace your manuscript editing or final file approval |
The practical split is straightforward: finish and format the content first, verify the files second, and approve production last.
Do not begin with an old cover template and force the book to fit it. For a 2026 print project, use requirements confirmed for that project, not assumptions carried over from another edition.
Expected result: your Reedsy project contains the complete book in reading order, with consistent structure and no positioning tricks that depend on a particular screen width.
Pay special attention to the first paragraph after a heading or scene break. An unintended indent or missing break is easy to overlook while editing individual chapters.
For nonfiction, make a separate list of tables, illustrations, and references to page numbers. Those references need checking again after export because the printed page positions belong to the final layout, not the drafting view.
memoir-interior-2026-approved.pdf; reserve the approved label until checks are complete.Expected result: you have a fixed-layout interior PDF whose page dimensions match the intended book specification. You still need to inspect the downloaded file before submitting it.
The core sequence is Manuscript structure, Print PDF, File checks, then Cover handoff. Keep that order: cover sizing depends on the interior, and file approval depends on the actual PDF.
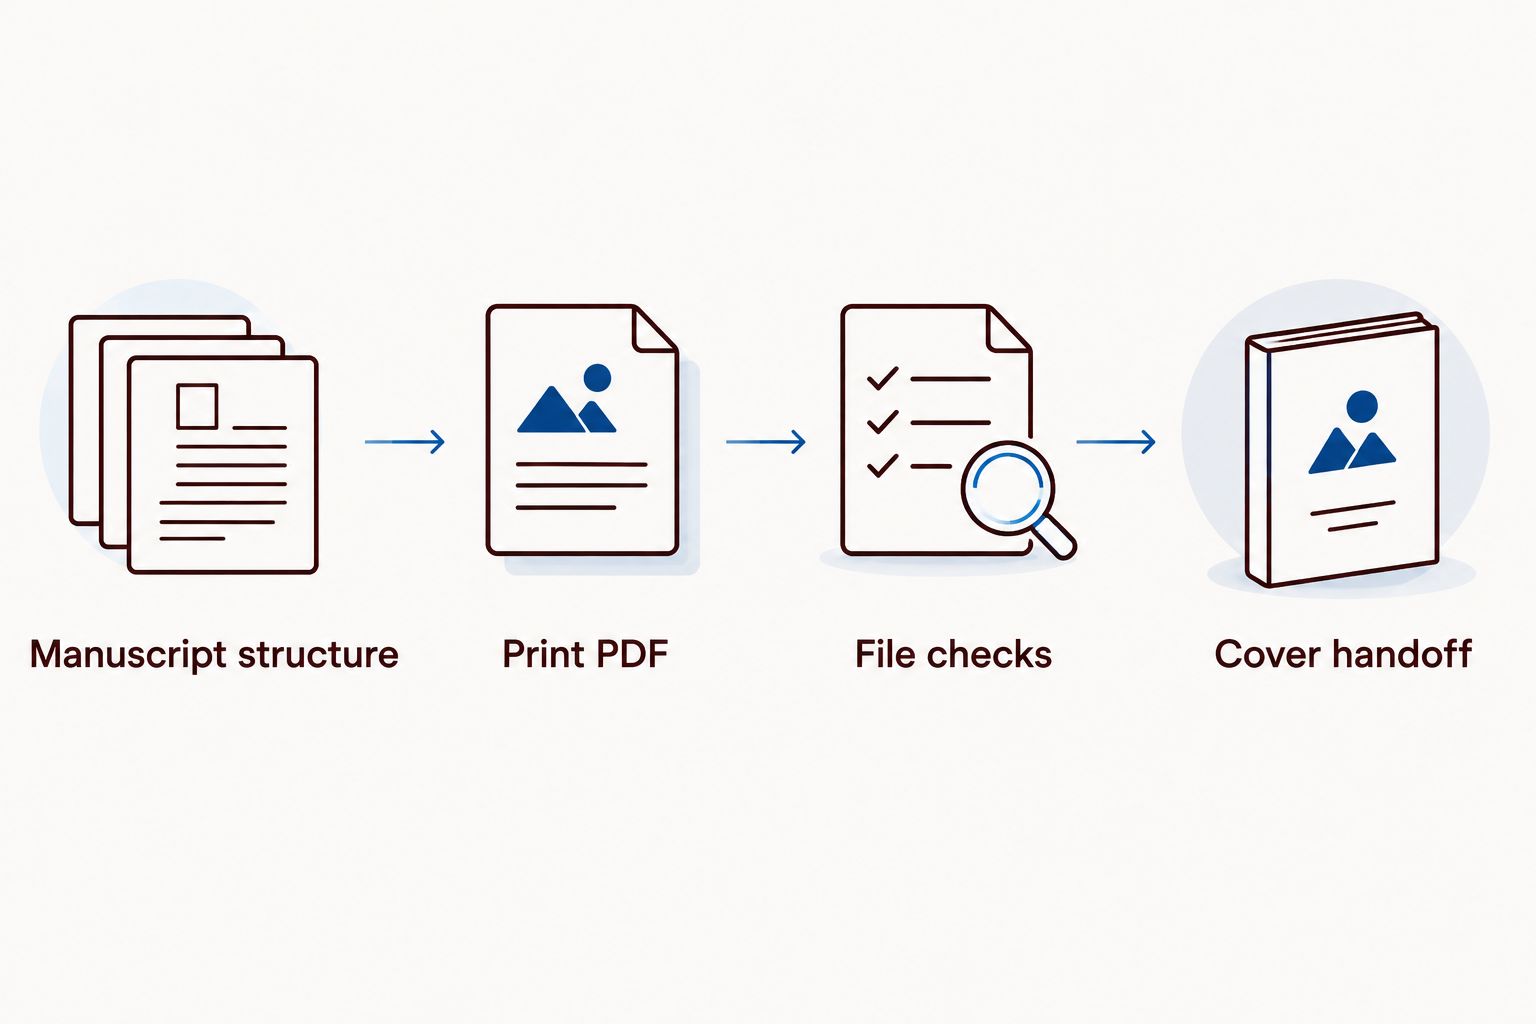
If the export cannot produce the dimensions or image treatment your printer requires, stop at this stage. Use a suitable layout application or a formatter to prepare the production file instead of stretching the PDF to fit.
Expected result: the interior PDF has passed content and production checks, and you have a confirmed page total for the cover handoff.
Print representative pages at 100% scale if you have access to a printer. Include an ordinary text page, a chapter opening, and a page with your smallest text or most detailed image.
This checks actual reading size. It does not reproduce the finished book’s paper, binding, or production color, so inspect a physical production proof when that is part of your agreed approval process.
Keep a brief release record for the 2026 edition: filename, page dimensions, page count, revision date, and unresolved questions. A checked file should have no unresolved production question attached to it.
Expected result: your printer has an interior, a matching cover, and clear production instructions for the same revision.
Publishing Xpress book printing is the production stage, not a shortcut around file approval. Check the scope of any file assistance with the printer; do not assume that submission includes editing, cover repair, or a redesigned interior.
For your 2026 release, save the approved files separately from working drafts. Keep the editable Reedsy project, original artwork, and production PDFs together in your archive, but clearly distinguish their roles.
A revised edition follows the same route, with an extra dependency check. A small text edit does not guarantee an unchanged page count. Added or removed text can shift chapter openings, contents references, and the end of the book.
Expected result: your corrected interior, cover, and approval record refer to the same version. For an unchanged reprint, use the archived approved files and reconfirm the production specification rather than exporting unnecessarily.
Fix the export specification, not the print scaling. Return to the source layout and select the intended size. If that size is not supported, prepare the interior in another layout workflow; scaling changes both type size and margins.
Check whether the layout intentionally starts chapters on right-hand pages. Intentional blanks preserve that arrangement. Remove accidental breaks in the source, but do not delete every blank page simply to reduce the PDF page total.
Check the original image and its reproduction size. Replace a small screenshot or compressed copy with the original asset, then export again. Inspect the new PDF instead of assuming that replacing the source fixed the result.
Review the inside margin against the selected binding and printer’s specification. Reconfigure the layout if possible; otherwise have the interior reformatted. Moving only the cover artwork will not correct interior clearance.
Compare the cover specification with the current page count and paper selection. Recalculate the spine through the printer’s required process, then reposition cover elements. Submit the corrected cover with the matching interior revision.
Keep the Reedsy route for books whose content fits its formatting tools. Text-led fiction, memoirs, and straightforward nonfiction benefit from a repeatable chapter-to-PDF process; intricate page compositions require a closer layout assessment.
If you are preparing a workbook, poetry collection, or illustrated guide, test a representative difficult page before formatting the whole book. Check writing space, deliberate line breaks, captions, and image positioning against the physical format you intend to print.
Maintain a specification sheet beside the manuscript. Record the trim size, binding, interior color treatment, paper decision, cover requirements, and approval status so a later collaborator does not rebuild those decisions from filenames.
How do I go from Reedsy to a printed book?
Export a print PDF from Reedsy, check it against your printer’s interior requirements, and prepare a matching cover separately. Submit both approved files with the agreed trim size, binding, page count, and color treatment.
Does Reedsy replace a book printing company?
No. Reedsy handles manuscript preparation and formatted exports, while a printing company produces the physical book. Publishing Xpress provides short-run printing for self-publishers and organizations.
Is a Reedsy PDF automatically print-ready?
No. Check its dimensions, margins, fonts, images, page order, and page count against your printer’s requirements. A successful export confirms file creation, not suitability for a particular print order.
Should I send an EPUB file to my book printer?
Use the printer’s required print PDF rather than EPUB for this workflow. EPUB is an ebook format, while the print PDF fixes the page layout you need to inspect and approve.
Can I use my ebook cover for the printed edition?
An ebook cover image alone is not a complete print cover. Prepare the cover to the selected binding’s dimensions, including a back cover and spine where required.
Do I need to remake the cover after editing my manuscript?
Recheck the cover whenever an edit changes the interior page count. A perfect-bound spine also depends on paper, so confirm both inputs before reusing the cover file.
Should I delete blank pages from my exported book?
Keep intentional blank pages that support the book’s layout, and remove accidental ones in the source. Review chapter openings and include every retained blank page in the production page count.
The last numbered page is not necessarily your book’s production page count. Unnumbered title pages, copyright pages, and intentional blanks still belong to the interior PDF.
Before approving your 2026 book, compare the PDF page total with the count used for cover preparation. That check catches a mismatch that a spelling pass cannot.
© 2026 Publishing Xpress. All Rights Reserved.

