July 28, 2026
Sending a book to print with an error you missed on page 47 costs you time, money, and a full reprint run. Proofing catches those errors before the print queue does — and in 2026, with print-on-demand and short-run digital printing making reprints faster than ever, skipping this step is still the most expensive shortcut a self-publisher can take.
A proof isn't a formality. It's the last checkpoint between your manuscript and a stack of finished, bound copies you can't un-print.
Most errors that make it to a finished book aren't typos — spell check catches those. They're layout problems: margins that don't account for choosing margins for your binding type, page numbers that shift after you add a dedication page, images that looked fine on a 27-inch monitor and pixelate on 100 lb. gloss stock. Publishing Xpress sees these three issues more than any others in files that come back for revision.
A proof copy in 2026 costs you one printed book. Skipping the proof and finding the error after your full run costs you the whole order. That math is the entire argument for proofing properly before you print.
Screens hide errors. The eye skims digital text differently than it reads print, which is why professional editors still print manuscripts before a final pass. Print your interior at actual trim size if you can, and read every page start to finish without editing on the fly — mark it, don't fix it yet.
Common mistake: reading on-screen only and assuming spell check caught everything. Spell check does not catch "there" for "their," doubled words, or a paragraph repeated after a copy-paste error.
Title page, copyright page, dedication, table of contents, acknowledgments — in that order, on the correct page parity (right-hand or left-hand page depending on convention). A front matter section out of sequence is one of the fastest ways to make a self-published book look self-published in the wrong way.
Confirm your copyright page includes the year — 2026 if this is a new edition — along with any ISBN and printing information you plan to use.
Common mistake: forgetting the copyright page entirely, or leaving a placeholder line like "Copyright [Year]" uncorrected in the final file.
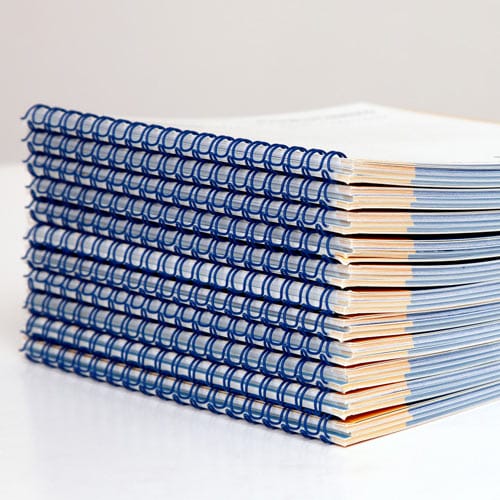
Margins aren't decorative — they're structural. Perfect bound books need extra inner margin to account for the spine gutter; saddle stitch booklets need less, because there's no spine to eat into your text block. Wire-O and plastic coil need the opposite adjustment, since the punched holes remove usable margin on the binding edge.
Run this check before you finalize anything. It's the single most common reason a proof comes back with text crowding the gutter or running too close to the trim edge.
Common mistake: using the same margin template for a perfect bound novel and a Wire-O workbook. They need different setups.
Open your exported PDF on a different computer than the one you designed it on. If fonts substitute or shift, they weren't embedded — and your printer will render whatever default font fills the gap, not the one you chose.
Check every image at 100% zoom in the PDF. Anything under 300 dpi at final size will print soft or pixelated, especially on cover stock or photo-heavy interior pages.
Common mistake: designing at low resolution because the file "looked fine" at 72 dpi on screen. Screen resolution and print resolution are not the same standard.
Add a dedication page late in the process and every page number after it can shift. Scroll the entire PDF and confirm numbering runs correctly, chapter headers match your table of contents, and no folio appears on a blank or divider page where it shouldn't.
Common mistake: trusting auto-numbering without a manual scroll-through after the last content edit. Auto-numbering breaks the moment you insert or delete a page.
This is the step self-publishers skip most often to save time, and it's the one that saves the most money when something's wrong. A proof copy from Publishing Xpress shows you exactly what your buyers will hold — actual paper weight, actual binding, actual color reproduction, not a screen approximation.
Order it before you commit to your full print quantity. One proof costs a fraction of a reprinted run.
Common mistake: approving files based on a PDF preview and skipping the physical proof to hit a deadline faster.
When the proof arrives, don't just flip through it — go back to your original manuscript checklist and verify each item against the physical book. Check color accuracy against your screen file, check that the binding lays flat or opens the way you expected, and check spine text alignment if your book is thick enough to have spine copy.
Common mistake: treating the proof as a formality once it arrives, rather than the last real inspection point before mass printing.
Once your proof checks out, lock your file and move to production. If you formatted your manuscript in Word rather than design software, review your printing from Word setup one more time — Word's export settings are the most common source of margin and font errors that surface during proofing.
How do I proofread a book before printing?
Print the manuscript and read it on paper, check front matter order, verify margins against your binding type, confirm fonts are embedded, and order one physical proof copy before your full print run. Reading on paper catches errors that screens hide.
What’s the difference between proofreading and proofing a book?
Proofreading checks grammar and spelling in the text; proofing checks the entire printed file including margins, fonts, images, and page order against a physical sample. A book can be proofread perfectly and still fail proofing if the layout doesn’t match the binding type.
Do I need a physical proof copy or is a PDF enough?
A physical proof copy is worth ordering because it shows actual paper weight, ink coverage, and binding — a PDF preview can’t replicate print color or trim accuracy. In 2026, ordering one proof copy costs a fraction of reprinting a full run over a missed error.
How much does it cost to fix an error found after printing?
The cost equals the price of the full print run, since a caught error after mass printing usually means a full reprint. A single proof copy, by comparison, costs one unit — proofing before the full run is the cheaper path every time.
Why does my proof show different margins than my screen file?
Margins shift when a file wasn’t set up for the correct binding type. Perfect bound books need extra inner margin for the spine gutter that saddle stitch or Wire-O binding doesn’t require.
Should I proofread before or after formatting the interior?
Proofread the manuscript text before final formatting, then do a second proofing pass after formatting to catch layout-specific errors like page numbering and margin shifts. Skipping the second pass is how formatting errors slip into finished books.
How long does it take to get a print proof back?
Turnaround varies by printer and order volume, so check current production timelines directly with your printer before setting a launch date. Build a buffer of several days into your schedule so a proof revision doesn’t collapse your deadline.
Most proofing failures aren't caused by bad writing — they're caused by a file exported once and never opened again before upload. Open your final PDF on a second device, at 100% zoom, page by page, before you approve anything for print in 2026. That single habit catches more errors than any checklist line item on its own.
© 2026 Publishing Xpress. All Rights Reserved.