July 27, 2026
Print-ready event program design turns a stack of speaker names, sponsor logos, and running order into a booklet a guest can hold, read, and keep. This guide walks through trim size, binding, bleed, and file export so your 2026 program prints clean the first time.
A program that looks fine on screen can print with cut-off text, blurry logos, or pages that won't lie flat once bound. Guests judge an event by the polish of the printed piece in their hands, not the PDF nobody else saw.
Most event program design for print problems trace back to two decisions made too late: trim size and binding. Fix those first and the rest of the layout falls into place. Publishing Xpress runs saddle stitch event programs for galas, conferences, and school events every season, and the same short list of mistakes shows up in nearly every rushed file.
Getting this right in 2026 matters more than it did a decade ago — sponsors now expect their logo to reproduce at the same quality as a glossy magazine ad, even inside a 12-page saddle-stitched booklet.
Pick the physical dimensions before you touch a template. Standard event program sizes run 5.5×8.5 inches (half-letter, the most common choice for galas and conferences) or 8.5×11 for programs with heavier text or full-page ads.
Page count has to land in a multiple of 4 for saddle stitch — a 20-page program is fine, a 21-page program is not. Miscounting here is the single most common reason first-draft files bounce back from a printer in 2026.
Common mistake: designing at 8.5×11 in a Word doc, then deciding to shrink to 5.5×8.5 after content is finished. Everything reflows and every photo needs repositioning.
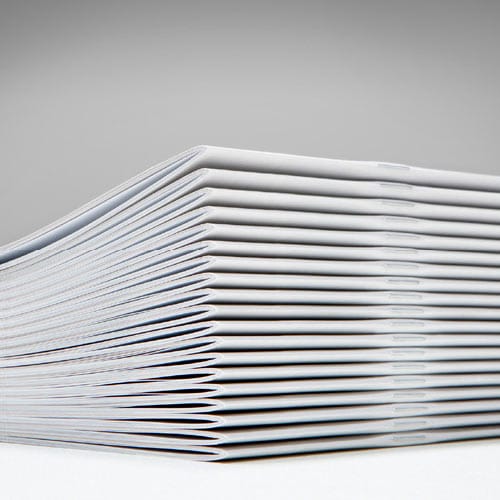
Binding decides how many pages you can run and how the booklet opens. Saddle stitch — pages folded and stapled through the spine — is the standard for programs of trim sizes from 4 to 64 pages and it lies flatter than any perfect-bound alternative at that length.
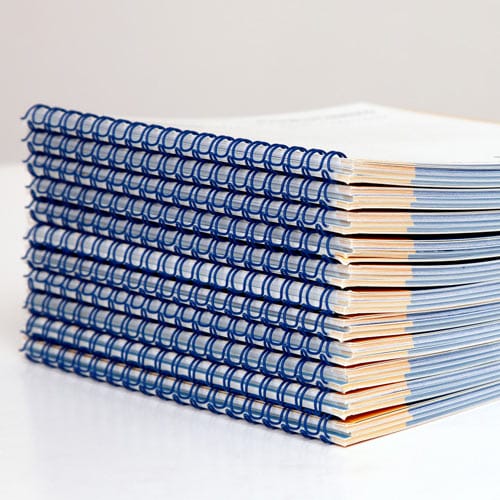
Past 64 pages, saddle stitch starts to gap at the spine and the booklet won't sit flat. Buy saddle stitch for anything under 64 pages; consider perfect binding for a 100-plus page conference program with a spine wide enough to print a title on.
Set consistent margins — 0.5 inch inside, 0.375 inch outside is a safe starting point for a 5.5×8.5 booklet — and a column grid before dropping in bios or ads. A grid keeps sponsor ad sizes consistent and stops text from crowding the spine.
Inner margins need extra room on saddle-stitched booklets because the fold eats into the gutter. Add 0.125 inch to your inside margin on any program past 24 pages to keep text readable near the spine.
Bleed is the extra 0.125 inch of image or color that extends past the trim line so the printer can cut without leaving a white edge. Every page with a full-color background or edge-to-edge photo needs it.
Safety margin is the flip side: keep text and logos at least 0.25 inch inside the trim edge so nothing gets clipped during cutting. Print-ready files with no bleed and tight text placement are the top reason proofs come back with visible white slivers along the edge.
Cover stock and interior stock don't have to match. A 100 lb. gloss cover holds up to handling through a three-hour event; 70-80 lb. gloss text inside reproduces sponsor logos and event photos with less show-through than a 60 lb. offset sheet.
If the program is text-heavy — a wedding order of service, a memorial program — a matte or uncoated 60 lb. stock reads easier under indoor lighting than gloss.
The cover carries the event name, date, and one strong image or graphic — resist the urge to list every sponsor on the front. Interior pages follow a repeatable pattern: welcome page, running order, bios, sponsor section, closing acknowledgments.
Repetition helps a reader navigate a 20-plus page booklet without a table of contents. Use the same header treatment on every section divider so a guest can flip straight to the speaker list without hunting.
Export as PDF/X-1a or a high-quality print PDF with crop marks and 0.125 inch bleed included, fonts embedded, and images at 300 dpi minimum. A screen-resolution export (72 dpi) will print visibly soft, especially on photos and logos.
Common mistake: exporting with RGB color instead of CMYK. Reds and blues shift noticeably once converted for print — check the color mode before you export, not after the proof arrives.
A physical proof catches problems a screen never will: color shifts, spine gaps, text too close to the trim edge. Order one proof copy before committing to a run of 100, 250, or 500 programs.
This step costs a day or two of turnaround. It's cheaper than reprinting 300 booklets because the sponsor logos printed muddy.
“If your program runs past 64 pages, saddle stitch is the wrong binding — switch to perfect bound or wire-o before you design a single page.”
Once the layout is locked, the next decision is which binding actually fits your final page count and budget. A 12-page gala program and a 90-page conference guide don't belong in the same format, and getting that wrong after design is finished means starting the file over.
What is the best trim size for an event program?
5.5×8.5 inches is the most common trim size for event programs in 2026 because it fits comfortably in one hand and keeps paper costs down. 8.5×11 works better for programs with heavier text blocks or full-page sponsor ads.
How many pages can a saddle stitch program have?
Saddle stitch binding handles 4 to 64 pages reliably. Past that range the spine starts to gap and the booklet won’t lie flat, so switch to perfect binding or wire-o.
Do I need bleed for an event program?
Yes, any page with a full-color background or edge-to-edge photo needs 0.125 inch of bleed on every side. Without it, trimming leaves a visible white sliver along the edge.
What paper weight works best for event programs?
70-80 lb. gloss text handles sponsor logos and photos well, while 60 lb. uncoated stock reads easier for text-heavy programs like memorial or wedding orders of service. Cover stock typically runs 100 lb. gloss for durability through a full event.
Should I use RGB or CMYK color for a printed program?
Always export in CMYK. RGB files convert automatically at the printer and colors, especially reds and blues, shift noticeably from what you saw on screen.
How far in advance should I order event programs?
Build in time for at least one proof copy before the full run — that’s typically a day or two beyond standard turnaround. Rushing straight to a 250-copy print run without a proof is the most common reason programs get reprinted.
Can I design an event program in Word?
Yes, Word can produce a print-ready program if you set the page size to match your trim size and export with bleed enabled, though dedicated layout software gives more control over grids and image placement for longer programs.
The detail that gets skipped most often isn't design — it's the inside margin. A 24-page saddle-stitched program with a standard 0.5 inch gutter will show text creeping toward the spine on inner pages; add that extra 0.125 inch early and every proof comes back clean.
© 2026 Publishing Xpress. All Rights Reserved.